Wednesday, August 18, 2010

Homemade Dishwaher Detergent, Laundry Detergent and Small Surprises

Two things that never seem to end at the homestead (or any house) are dishes and laundry. I make my own dishwasher detergent and laundry soap, and I love it when they both run out at the same time- they both use the same ingredients!


Homemade Dishwashing Detergent

20 Mule Team Borax
Arm & Hammer Super Washing Soda Powder

This can’t be easier- it’s literally a 1:1 ratio. I do 2 cups of each at a time and keep it in a used 40 oz. peanut butter container.

Also, for added shine, you can fill your final rinse thing with distilled vinegar, but to be honest I forget to do this and it generally happens about once a month.


The Homemade Laundry Detergent I use is apparently copyrighted, so I have to do this…

Homemade Laundry Detergent Recipe

I will say that I love this stuff- since it’s a no sudsing detergent, it works great in my HE (High Efficiency) washing machine. My 4 kids and I all love to play outside, and this detergent has never let me down!


Other Happenings at the Homestead

I am still working on Buffy’s coop. Today I started putting the fence up for the run. This fenced-in run is only 6 ft by 6 ft and 6 ft tall. It’s connected to the run for the main coop, but there’s not door to allow access from one run to the other. I didn’t get too much accomplished before the rain started. Seriously, everytime I work on this coop, it rains. Had I known I had this power before, I would’ve started the coop a lot earlier, and worked on it every three days…

Also- when I collected eggs today, I found two very small surprises! Two of my little hens had laid their first eggs! Woo Hoo! I can’t tell you how cool it is that the very little eggs today came from hens that I incubated from eggs that my older hens laid this spring! It’s amazing to see it come full circle! You would think I laid them all myself judging by my excitement!


Tomorrow I am back to work at the fence, and hopefully the rain will hold off so I can finally get this done! I still need to get my fall garden cleared and planted and the main garden is in desperate need of attention as well!


Monday, August 16, 2010

Something Smells, Part II

Ok, with the dehydrator fixed, I tried the onions again. They did work the first time, but not being able to document it, I decided to wait on this post. But here it is!

I will admit that these are store-bought onions, not homegrown. I can never seem to get my act together enough to grow onions, or garlic for that matter. Having said that, let’s move on.

Dehydrating onions is a great idea. I got a bag of onions, for a buck or two, and was able to make onion flakes, and onion powder- which, for both would probably cost $5 or more to buy in the store…and it couldn’t be easier to do.

Cut your onions, fill your trays, and set the dehydrator outside- DO NOT miss this step. Serious as a heart attack- onions in the dehydrator smell like really bad B.O. and you don’t want that in your house- or anywhere near it. I had mine in the garage (unconnected to the house).


I fill my trays as full as I can get them- as you can see, and it was hot and muggy outside, so adjust your timing to your own climate. It took over 24 hours to completely dry them, and I did bring them in for the last few hours, which, by this time the onions smell incredible, so I was safe. Well, safe enough to bring them inside, not safe enough for my mind to go from onion rolls to a greasy cheeseburger!


Once they are completely dry, you can either seal them in a jar, as I did with the first batch, or take them to the blender to powder, as I did with my second batch. One word of warning when making onion powder: the powder process makes a lot of dust, so when you open the lid, keep your face away until the dust settles (just a minute or so)- it will affect your sinuses for hours if that dust get up in there. (yes, personal experience).


Now, you can even go a step further, and make onion salt. To do that, you would just mix three parts salt to one part onion powder. I don’t do this, as I watch my salt intake very closely. My parents both have/had heart disease, so salt intake is very much controlled in this house. I do use salt, but I like to go solo on it, and not have to worry about it being mixed into everything.

And that’s all there is to it! Once you realize just how easy it is, and how you can control what goes into what you put in your family’s mouth, store bought just doesn’t seem to make as much sense.

Sunday, August 8, 2010

Something Smells and other Adventures on the Homestead

This post was supposed to all about dehydrating onions for onion flakes, onion powder, and onion salt, but life sometimes has other plans…

Yesterday started out as normal. I placed a call to the blackberry patch, but was disappointed to learn that the beetles ate their entire crop. I also placed a call to the person that was giving away a chicken coop for free, if I came to get it. She had said she would call when her errands were done.

Onto the Onions- I chopped enough onions to generously fill my dehydrator trays, and, just like the internet told me, I placed them outside in the garage because the smell was not pleasant. (that info is dead on!)

I came in to make some mozzarella cheese and the crust for our homemade pizza for dinner, and when I came back out to the garage to check my onions, my dehydrator was no longer running. Upon further investigation, the fuse/resistor to the heating element is done for, which shut off the entire machine (good thing- fire hazard).

So off I go to Radio Shack to see if they have the part I need, and no sooner did I get in the parking lot, my oldest daughter calls with my son screaming in the background. She tells me that he has a nail stuck in his hand. She takes a picture and sends it to my phone, in which I call her and tell her to just pull it out, she says she tried and can’t. She says the head must be in his hand…So, home I go, with no part, no nothing.

When I got home, I looked at his hand. It was so jammed in there, it didn’t even wiggle. Off we go to the Urgent Care, where the doctor pulls about 2 inches of a large sewing needle out of my dearest’s hand. Yeah- success…It’s now 6:30 p.m.

On the way home from urgent care, the lady with the coop calls, and says it’s a good time- ha ha! I told her to give me an hour, I had to get dinner for the kids.

Back home, I am rolling out pizza dough, my daughters are shredding the cheese, and my son is telling everyone how he has been reborn since the needle came out.

Pizza’s done, give it to the kids, and off we go to the neighboring town for the coop. Finally, at 8:30 I am staring at the coop, and they are loading it on to the back of the truck. This coop was made by hand out of OSB board, and about 5 ½ feet tall, with a tin roof, which would bang and threaten to fly off if we drove more than 30 mph on the way home. And, while going through town on a Saturday night, everyone gawked at us. We laughed the entire ride home…Makin’ Memories is what it’s all about! Here’s a picture of my new coop, which my mother has named it the Mother In-Law Suite.


On a more serious note, this coop will be perfect after we cut the legs down so the coop is about a foot or so off the ground, and we tighten down the roof. My Buff Rock Hen, Buffy (yes, I’m creative) has been in my studio in seclusion for several weeks after being beaten up again, so this will be the perfect little abode for her. She has missed being able to go outside and is noticeably angry with me and my promises of the great beyond. She will love it!

Anyway, today is a new day. My son’s hand is doing better, the coop is here, and the dehydrator is still working on those onions (We got it to work, but it may be a fire hazard and I still haven’t decided if it’s cooking the onions or drying them). Tomorrow I may get a new one, but, in the words of my favorite movie character, “Tomorrow is another day!”

Chickens and Turkeys Fill The House, and There Ain't Nothin' Foul About It!


We have had a heat wave here on the homestead, and finally broke down and turned on the air conditioning. I was hoping to get a lot of indoor stuff done, but truth be told, I have been very spoiled and very lazy.

I did, however, can the first of the chickens we culled this spring. Since I am still new to my pressure canner, and haven’t had the best of luck with it, I started with just one. I simmered the chicken for about 5 hours, then took the bird out, grabbed the meat off the bones and canned the meat. I then put the bones back in with some herbs and spices and cooked the broth for another 4 hours, and then canned the broth! And guess what?! It worked perfectly! For the one chicken, I only got 2 pints of meat, but I canned 5 quarts of broth. I don’t know about your house, but we use chicken broth in a lot of things- mashed potatoes, stuffing, rice, casseroles, not to mention soup.

My poor kids, they smelled chicken cooking all day, and I made them cheeseburger macaroni for dinner- bad mama!

I do have 2 more chickens in the fridge right now thawing, so hopefully tomorrow I can do it all over again. I had 4 chickens left to do, but I don’t think my pot can handle more than two at a time, so two at a time it is!


While all of this chicken was simmering on the stove, I had my turkey in the dehydrator for jerky. Making jerky is such an easy process, everyone can do this!

My marinade: I have to admit, I would use this marinade on turkey, beef, or venison for jerky- it’s just that good! I got this recipe from my friend Chris, so thanks Chris!

1 bottle Italian Dressing
¼ cup Worcestershire Sauce
1 TBSP Dales Steak Seasoning
A few shakes of Tony Chachere’s Creole Seasoning
A few drops Liquid Smoke

(I know you are looking at this all weird, since there’s a few different ingredients than you’re used to, but since meeting my friend Chris, and learning about these –the Tony’s and the Dale’s- these really are staples at my house now.)

Anyway, mix together all ingredients and put thinly sliced turkey in marinade for 24 hours. Then throw them into the dehydrator and move along. I always do this right before be so I can sleep through most of it. The timing depends on the thickness of the slices- I like mine a little thicker and it takes mine about 12 hours.

Anyway, very easy, and delicious- my kids had this batch eaten in about 24 hours.

And with the chicken in the fridge is my last wild turkey breast, just cryin’ to swim in that marinade!

Monday, August 2, 2010

Canning Beans


In my last post, I mentioned that I was canning green beans while writing. This was the third attempt at canning beans in my pressure canner. I must say, this pressure canning stuff is harder than it looks- at least for me. All three times I have had liquid loss, though I end up with a good seal. Upon investigating on the internet, this is the best information about it I found.

Courtesy of http://www.extension.umn.edu/foodsafety/components/pdfs/foodprestrouble.pdf

Food Loses Liquid During Processing:

􀁹 Jars filled too full (leave recommended headspace).

􀁹 Fluctuating pressure in a pressure canner.

􀁹 Forced cooling of a pressure canner.

􀁹 Jars packed too tightly.

􀁹 Removed jars from canner too quickly. (After removing cover, let jars set a few minutes in canner until boiling goes down.)

􀁹 The canner stood too long after pressure returned to zero.

􀁹 Not exhausting pressure canner long enough.

􀁹 Starchy foods absorb some liquid.

􀁹 Water not 1 inch over jar lids.


First of all, the water not being 1 inch over the lids doesn’t apply to pressure canners. The only thing I can even think of on this list is not leaving enough head space, but it would’ve been MAYBE ¼ inch over. Could that be it? It could… If you have any advice, I would love to hear it.

Up until this year, I canned green beans in my water bath canner, but the beans had to process for 2 ½ hours which is both time consuming and not energy efficient. However, it is tried and true and hasn’t let me down yet.

Another thought I have had is to use my water bath canner, though instead of processing on the stove, doing it over a fire. I have done a little research on this, and may give it a try. Thoughts?

******

On another note, I went in the garden today to find that the deer had an all-nighter in my corn. There was not a stalk, not an ear left untouched. I also found cherry tomatoes rolled into my squash plants. What I would give for a motion activated camera! What made me mad was that my dog was outside last night, so either the deer bribed him, or he’s getting to be old and not so guard-doggish anymore. Clearly they find my corn tastier than the acres and acres and acres of field corn planted in every direction around here. Either way, lesson learned for next year- I will be planting my corn and tomatoes on the opposite end of the garden, closer to the house. I have had plans to fence the entire garden in, but it never seems to work out in the budget. Maybe next year.

Coming Up: I have a wild turkey breast and the first of the spring slaughter chickens in the fridge thawing out- the turkey will be made into jerky, and the chicken will be canned- pressure canner willing. I am also still trying to capture wild berries for more jam. Stay Tuned!

Saturday, July 31, 2010

Catch Up!

Well, shoot- I have been so busy doing, I forgot to post what’s been going on around here! I promise I will try to post more often, even if it’s not a long post.

So what’s been going on?


I put 21 eggs in the incubator, and 16 hatched. I ended up with 8 hens and 8 roosters. These chicks (now chickens) were healthier, friendlier, and bigger than the chicks I bought at Tractor Supply last year. They are all still alive and getting big- the roosters are crowing, and the hens should start laying in just a few more weeks! We did slaughter 5 chickens once I knew the eggs hatched- I plan on canning these guys for both meat and broth. Right now I have 12 hens and 9 roosters. I will kill of all but 2 roosters, and we’ll be good to go.


My neighbor came over with his tractor and tilled my garden twice in about 30 minutes and the planting began!


I planted: potatoes, cabbage, lettuce, broccoli, cauliflower, peas, carrots, radishes, green beans, tomatoes, corn, zucchini, acorn squash, cucumbers (pickling and slicing), pumpkins, watermelons, cantaloupe, and honeydew. I also tried to plant some raspberries along the perimeter, but once again, no luck. Oh yeah, I forgot about the gourds that I planted last year and came back- they’re taking over my garden and I may have to go into the gourd business!!


I had intended to plant an herb garden, but I ran out of time. Up until today, I continued to think about planting it this year. I have now decided that the herb garden will wait until next year, and I’ll plant my fall crops here instead (green beans, cabbage, broccoli, cauliflower, radishes, and carrots). So, while I have already started clearing it, I’ll spend this week getting the rest cleared and planted.


As far as canning goes, I have canned almost 60 pints of jam- strawberry and strawberry rhubarb. I am trying to capture enough wild blackberries to make some jam, and my sister is picking Concord grapes for me to make jelly.


I have also canned green beans, using a pressure canner for the first time- tricky business. I am canning some beans right now. My experience is to hot pack for success. And yes, this comes after two previous failures.


Anyway, I guess that’s what’s been going on here! Like I said in the beginning, I plan on checking in more often from now on, so see ya soon!

Thursday, March 11, 2010

My Hens are on Strike and My Roosters are Making My Mouth Water

Spring has finally happened here at the homestead. It’s always a busy time, full of babies, and garden chores.

We purchased an incubator, and will be trying to hatch our own eggs for the first time. My hens, who have been laying beautifully all winter must have caught wind of my plan and some of them have decided to go on strike. My 3 White Leghorns are still laying, but my 2 Rhode Island Red hens are striking. I also have a Buff Rock hen, but since she was injured, she hasn’t laid anything, and even if she was laying, she’s not letting the roosters anywhere near her. So, instead of the 6 eggs per day I was hoping for, I am getting about 3 per day. Not as many as I wanted, but the hatch will go on as planned.

If you know me, you know that I hate my roosters. I have 4 Rhode Island Red roosters and each one is meaner than the other. They are the product of buying a straight run of reds so that I could have 1-2 rooster, but 4 of the 6 chicks turned out to be roosters. As soon as I have chicks from the eggs, these roosters, yes, all 4 of them will be culled. I will admit, I have never done this before and I am a little intimidated by it.

So, with the Leghorn hens, and the Red Roosters, I was wondering what our chicks will look like. I googled to see what the chicks may look like and found this- a black chick?! Too freakin' cool!


image from: http://www.backyardchickens.com/forum/viewtopic.php?id=230028


We are definitely keeping our fingers crossed for at least one black chick.

Coming up on the Homestead: I’ll be starting my tomatoes and peppers in the house, my spuds are sprouting and ready for planting, and I will be making my own laundry detergent for the first time. I also want to talk about the herbs I have chosen for the herb garden and why.


P.S. We had 5 kittens the other night from our resident mama Sheba. Too Cute- Here’s some pictures!


Saturday, March 6, 2010

Survival Food for Thought

In this blog, I don’t want to go in depth too much over “survival”. By working my homestead, I am creating a self sufficient lifestyle. It’s a simple fact that the less you depend on civilization, the less you suffer in a survival situation. Agreed?

I want to mention it now because I have been hearing a lot of talk about preparation and creating a survival food cache. This is all well and good (and necessary), but what disturbs me is that a lot of “survivalists” have a fantasy about hunkering down in a bunker eating MRE’s (Meals Ready to Eat) and beans and rice. Is this REALLY how you want to survive?

To me, the entire notion of preparing ahead of time is so that you can store what you want to eat, what you like to eat, and what your loved ones (picky kids) like to eat. This way, when a survival situation arises, there is less stress (especially among children) when there is comfort food.

MRE ‘s are easy to store and have a long shelf life, but have you actually ever eaten one? Do your kids like them? Beans and rice, while extremely nutritious, are fine, but do you want to eat them day after day? My kids won’t eat any of that now, what makes me think they would be fine to eat them in TEOTWAWKI? People think that they have to be miserable in a survival situation. Why prepare ahead of time then?

In every survival food book you will see, “STORE WHAT YOU EAT, EAT WHAT YOU STORE”. It baffles my mind that more people don’t listen to that. There are so many simple steps you can take now to not only survive, but to thrive. The whole purpose of survival caching now is to make sure life can go on as close to normal as possible. This is especially true if you have children.

For instance, we love bananas and apples. In a world crisis, you would be hard pressed to find a banana in my neck of the woods, and unless you have apple trees on your property (given we’re not talking about anything nuclear), apples would not be easy to find. In one weekend, you can dehydrate bananas and apples, and can apples and/or applesauce. Done. Good food, set for the future. Yummy and flavorful in times of stress or not.

The same goes for your survival garden. Last year, I got what I thought, was a really good deal on a survival bucket of seeds. The problem, I learned, was that most of the seeds were foods we don’t eat. Hey, if you like turnips and rutabagas great, but I personally don’t even know what to do with them. I wasted time and money on things I would never use. Plan your garden around what you love to eat fresh, canned and frozen. This year, I am only planting what I want. I bought non-hybrid seeds of things I actually want to eat again. It ended up costing me $30 less than the “great deal”.

Gardening will be a big topic of this blog, so we will most definitely talk more about that at a later time. This post is to remind you all on how important it is to use this time now to make sure you and your family can live as stress free as possible. And I step off my soapbox.

P.S. DON’T FORGET TO STORE SOME CANDY!

Thursday, February 25, 2010

Dehydrating Eggs

I have too many eggs in the fridge, and since the power can be tricky around here, especially during the spring storms, I try to can or dehydrate everything. The directions I have followed for dehydrating my eggs are here: http://www.dehydratorbook.com/dehydrate-eggs.html

Since I have so many eggs, one fruit leather tray, but 5 dehydrator trays, I chose to scramble the eggs (without milk), and cook the eggs on the griddle w/o grease or butter. Then off to the dehydrator. DO NOT RUSH THIS PROCESS!!! If your eggs are not fully dehydrated, they will mold and ruin the entire batch. At this point, Abbey says they look like corn flakes. I have a small table-top dehydrator, and loaded to capacity, this takes between 16-18 hours.


(right out of the dehydrator)


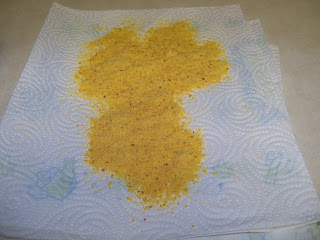
(This is powedered in the blender)


Once they are fully dehydrated, put them in the blender and powder them...This should only take a few seconds. If they don't powder quickly, you may have to dehydrate them some more. The last step is to store them. The website said to store them in a jar or container. I am going to vaccuum seal them in bags marked with how many eggs are contained. And you're done!


To Use: 1 Tbsp egg powder = 1 egg....to reconstitute, mix 1 part egg to 3 parts water. Obviously you can't fry them again, but will be great in baking of all sorts.


In the future, I would like to dehydrate just the egg whites (perhaps dehydrate the yolks separately). I may also scramble both the reconstituted eggs vs. Fresh eggs to see the differences in taste and texture. Until then, Stay Tuned!